Tools
Crop
Procol’s Crop does the job of the masking easel: it crops and straightens the print without touching the photo, with aspect ratios, composition grids and straightening.
Under the enlarger the paper sits in the easel, a frame with adjustable blades that decides which part of the negative lands on the sheet and leaves the white border. Procol’s Crop does the same job: it crops and straightens the print without touching the photo. You can change your mind at any time, even days later.
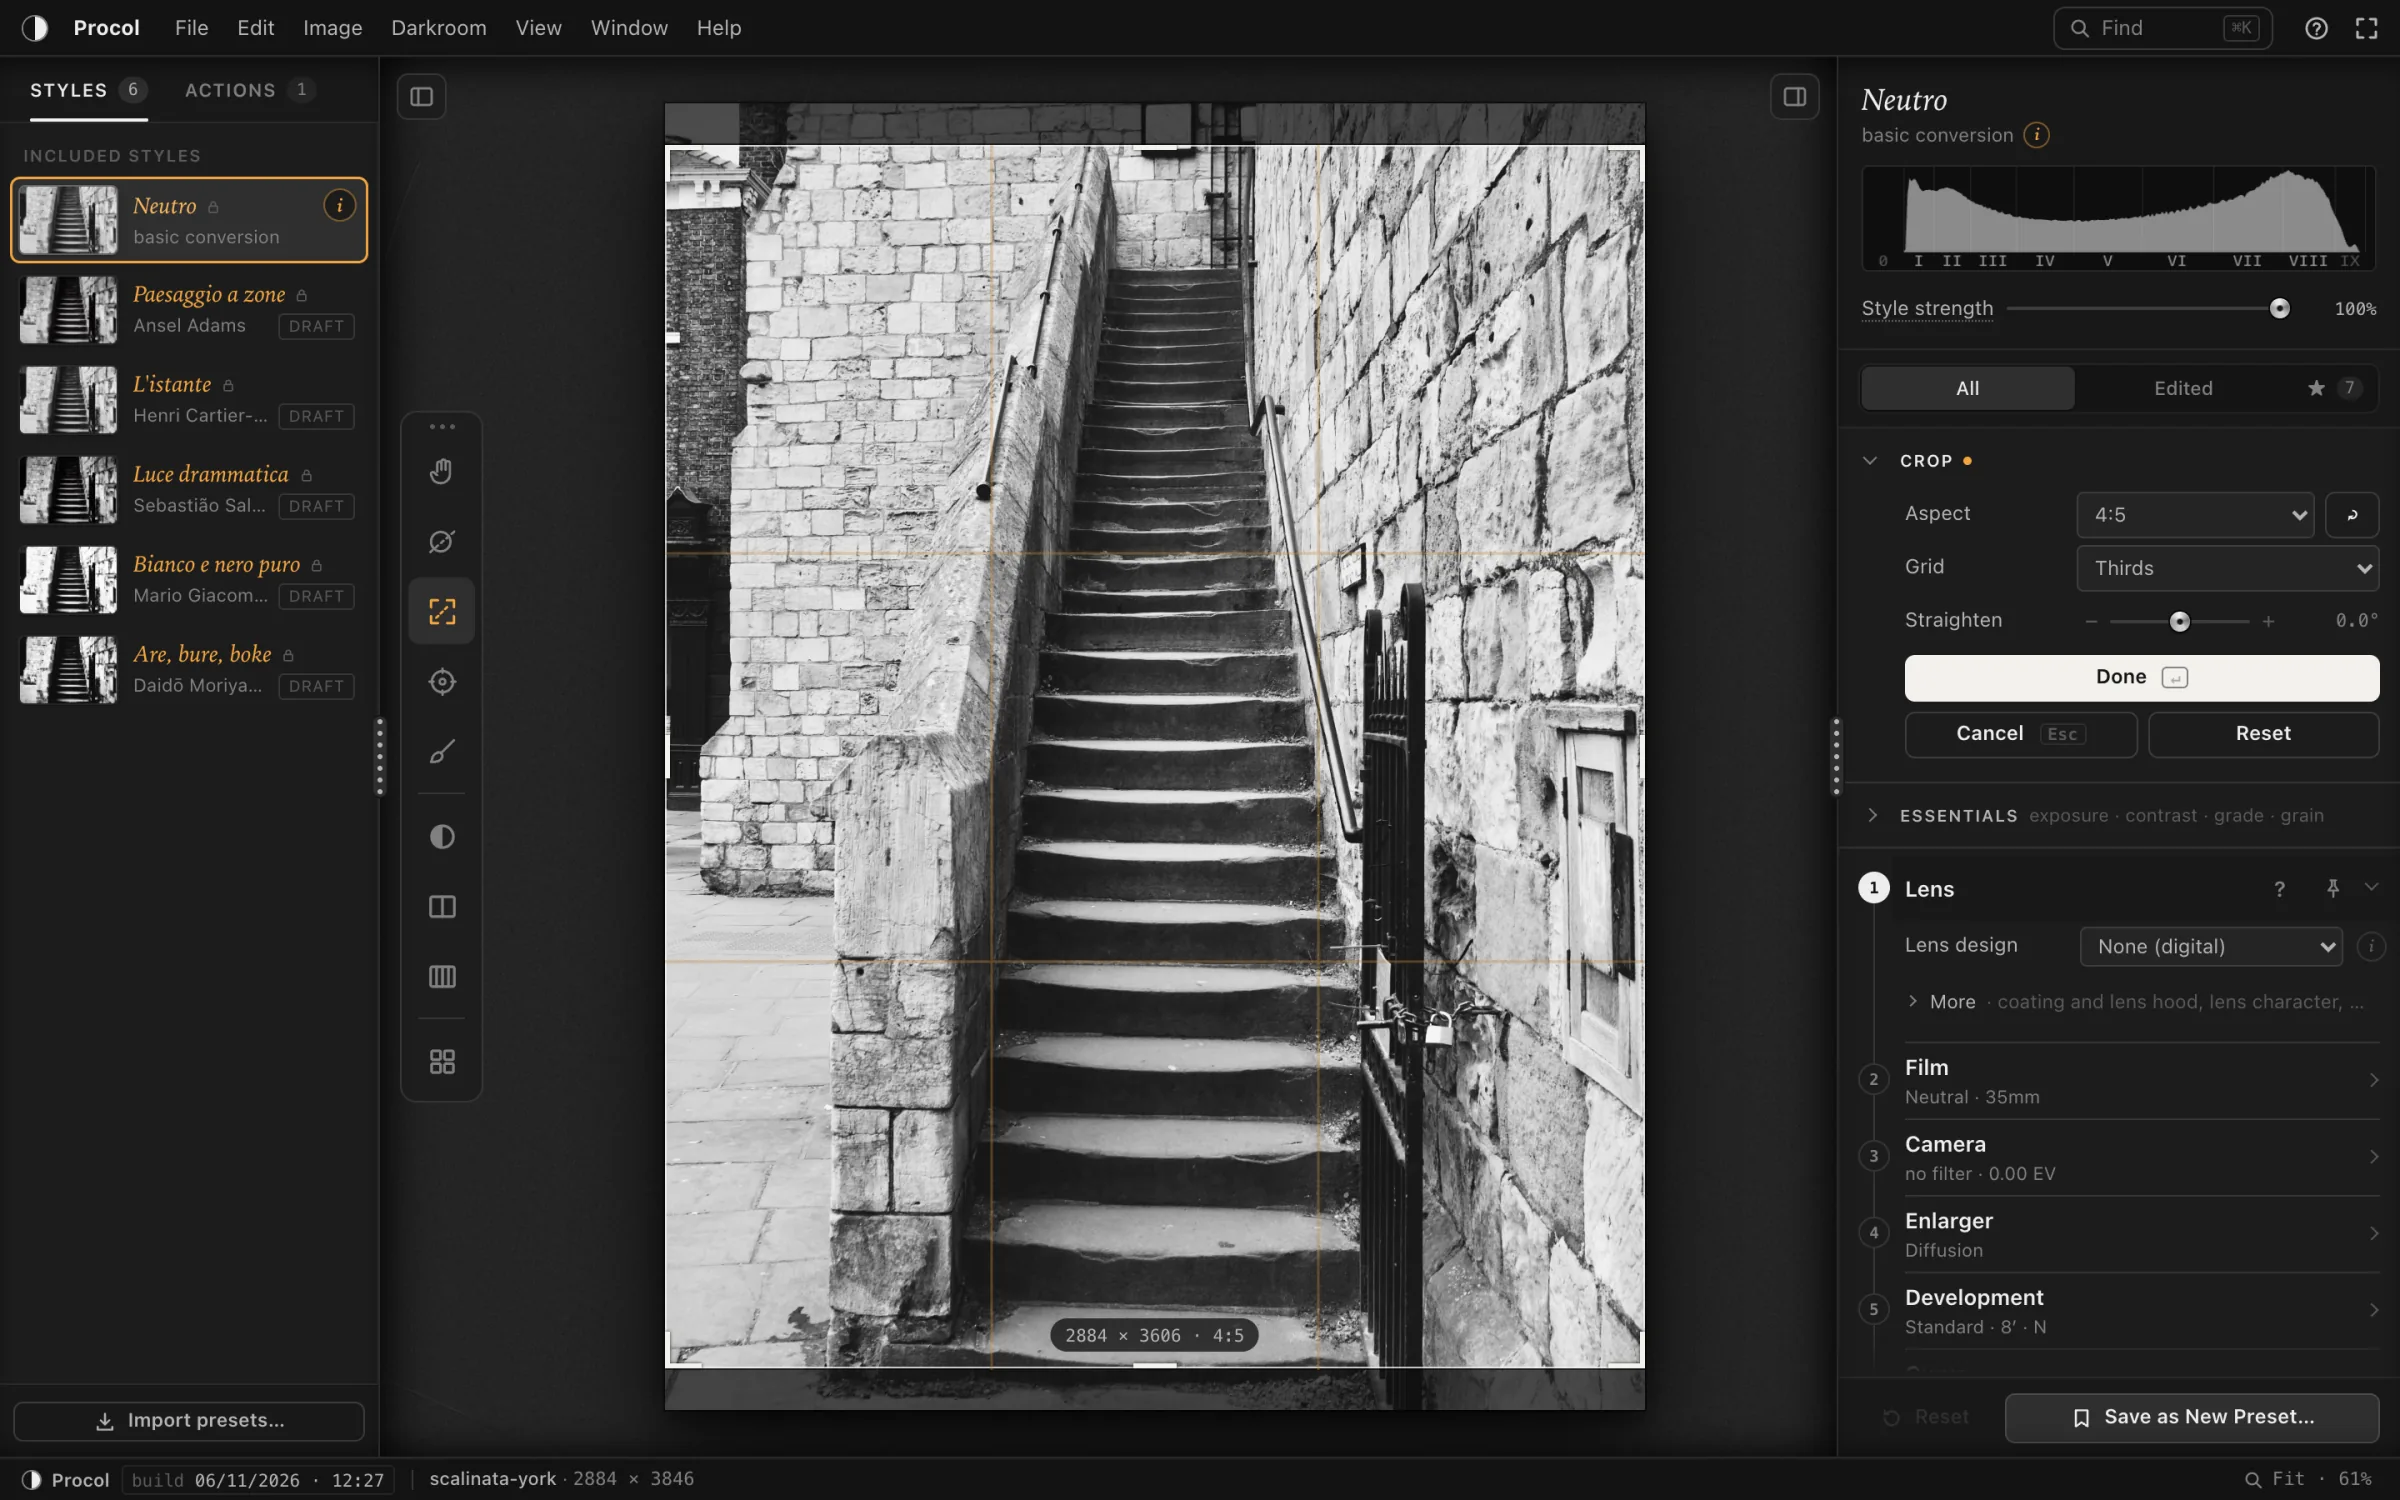
Opening Crop#
- The Crop button in the tool strip to the left of the print (the third one, under Masks);
- the menu Image › Crop…;
- the R key;
- or, in the right-hand column, the Crop block at the top of the Inspector, with the Crop on the photo button.
While Crop is on you see the whole photo: the sheet shown clear, the rest dimmed. The controls are in the Crop block at the top of the right-hand column (on tablet, in a bar over the photo). When it’s closed, the block sums up the crop in one line: ‘full photo’, or ‘2400 × 3000 · 4:5 · +1.5°’.
Crop and Essentials sit together at the top of the Inspector and open one at a time: open one and the other closes.
The blades#
- Drag a corner handle to move two sides together.
- Drag a blade at the middle of a side to move just that side.
- Drag inside the sheet to move it over the photo without changing its size.
- Drag outside the sheet to draw a new one.
- Hold ⇧ while you drag and the proportions stay as they were.
It all works with a mouse, a finger or a pen, the mouse, in the 100% view too.
Aspect#
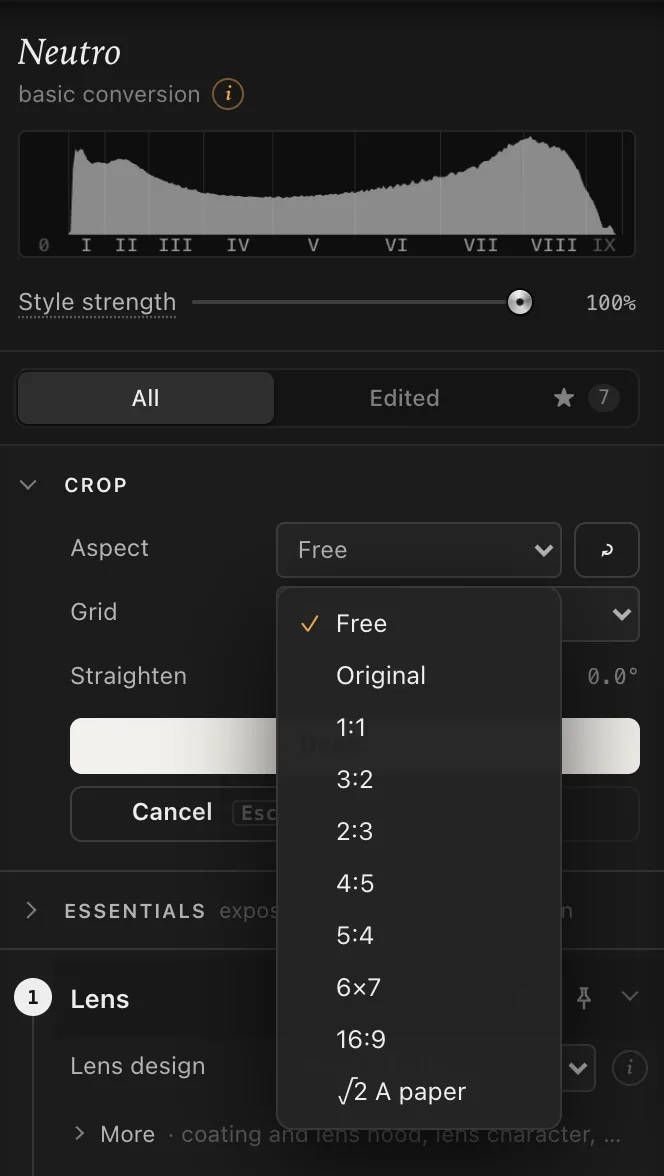
The Aspect menu locks the ratio between the sides. Once you choose an aspect, the blades keep to it.
| Aspect | What it’s for |
|---|---|
| Free | No constraint. |
| Original | The photo’s own ratio. |
| 1:1 | The square of 6×6. |
| 3:2, 2:3 | 35mm, landscape and portrait. |
| 4:5, 5:4 | 4×5 large format and 8×10 paper (20×25 cm). |
| 6×7 | The ‘ideal’ medium format. |
| 16:9 | The widescreen of a monitor. |
| √2 A paper | A4, A3… sheets: print with no border to trim off. |
The button next to the menu swaps landscape and portrait (6×7 becomes 7×6, Original becomes ‘Original, rotated’). With 1:1 it’s off.
Grid#
While you adjust, a grid appears to help with the composition; at rest it stays faint. The Grid menu (on tablet, the Grid button) chooses between:
- Thirds: the rule of thirds, two lines each way.
- Fine grid: a close mesh, for lining up horizons and verticals.
- Diagonals: the two diagonals, with the perpendiculars from the corners.
- Golden ratio: the lines at 0.382 and 0.618 and the golden spiral. On an upright sheet the spiral turns by itself; on tablet a button with the spiral turns it towards another corner.
Image › Crop Grid or the G key also move to the next grid, while Crop is on.
Straighten#
For a crooked horizon.
- The Straighten slider runs from −45° to +45°. The − and + at the ends turn by half a degree (hold to repeat); the scroll wheel over the slider by a tenth.
- Double-tap (or double-click) the degree value: back to 0°.
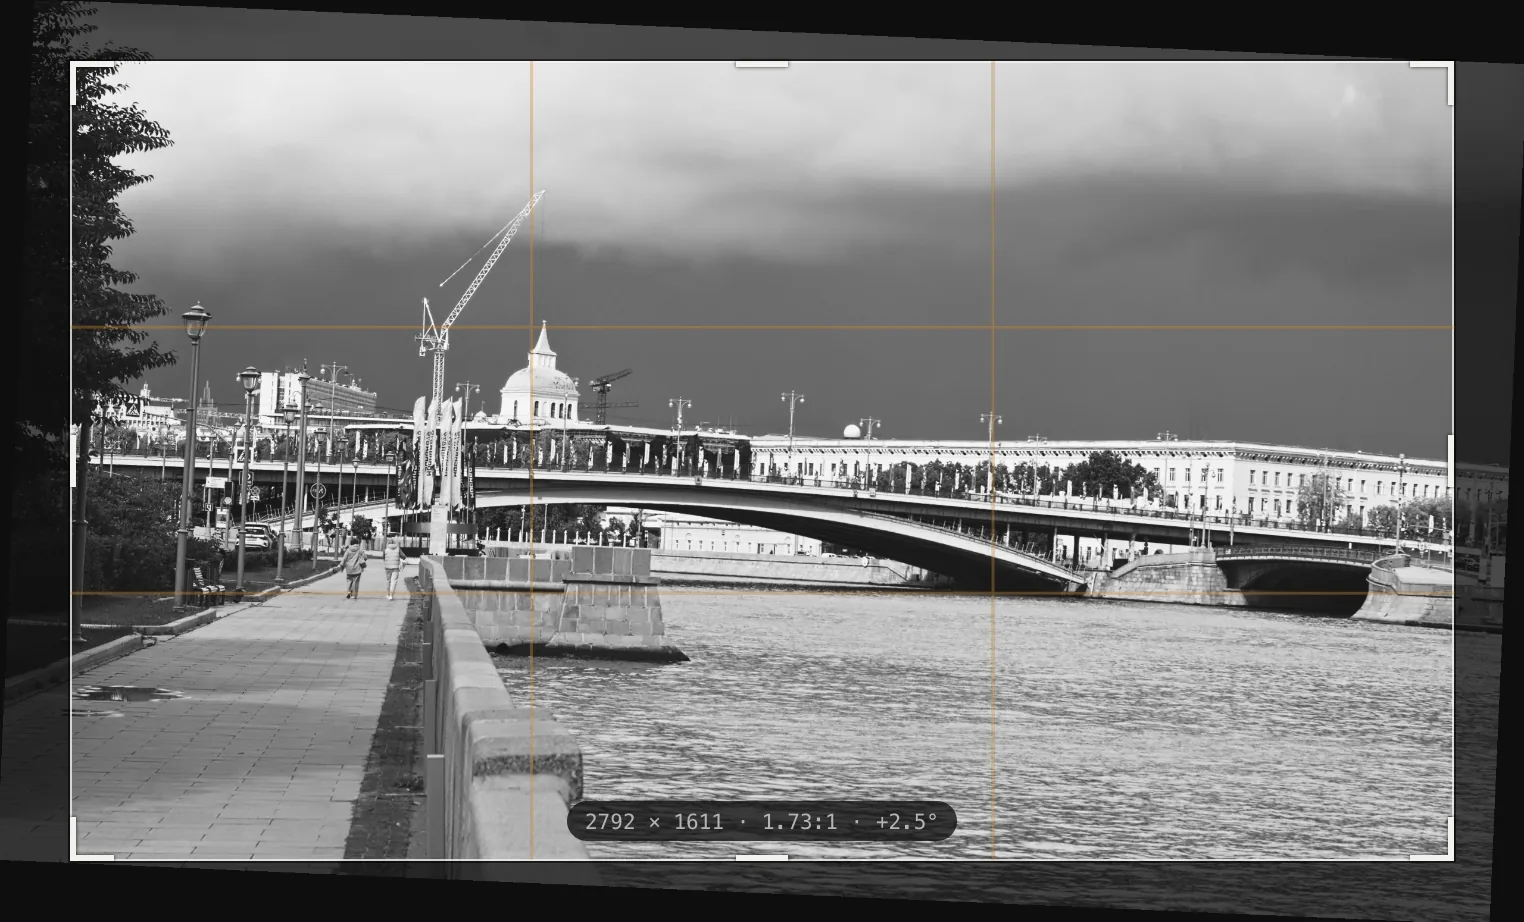
- On the photo: come up to a corner of the sheet from outside. The pointer becomes a curved arrow; drag and you turn the photo. While you turn, the fine grid appears. With ⇧ the angle moves in whole degrees, with ⌥ the rotation is finer.
- With a finger: touch just outside the corner and drag. For precision there are still the slider and − / +.
The photo turns around the centre of the sheet, and the sheet shrinks as much as it needs to stay inside the photo.
Confirm, cancel, start again#
- Done (↵ Enter, the keypad one too) confirms and shows the cropped print. Enter applies even if you’ve just used another control in the block.
- Cancel (Esc) closes and puts the crop back as it was when you opened Crop.
- Reset goes back to the whole, straight photo.
- Image › Clear Crop does the same without opening Crop.
A label on the sheet gives the pixels the export will have, the aspect and the angle.
What follows the sheet#
Crop is an easel, so some things follow the sheet and others stay with the photo.
- They follow the sheet: the border, the lens vignette and the edge burning, worked out on the cropped sheet as under a real easel.
- They stay with the photo: the masks and the brush strokes. Cropping doesn’t move them. While you work with Masks on a cropped photo you see the whole negative, with the sheet marked by a dashed line.
- The histogram and the Zones scale read only the sheet.
- File › Export… saves the cropped, straightened print at full resolution; the Proofs show the same crop.
Cropping is enlarging#
On the same paper a tight sheet shows coarser grain, just as under the enlarger: half the frame on the same paper is twice the enlargement. The grain index in Film allows for the crop.
The crop belongs to the photo#
- It goes into History: one step per move, undone with Edit › Undo (⌘ Z).
- It doesn’t go into presets, into Edit › Copy Settings or into recorded actions.
- Open another photo and you start again from the whole frame.
- In File › Apply to Multiple Files… you can ask for the open photo’s crop to be used on the other files too, in proportion.
Example: a flight of steps, upright#
- Open Crop with the Crop button (or R).
- Aspect: 4:5. If the sheet comes out landscape, tap the button that swaps the orientation.
- Grid: Diagonals, then drag the sheet to bring the handrail onto a diagonal.
- If the verticals lean, Straighten half a degree at a time with − and +, or a tenth at a time with the scroll wheel.
- Done.