ProcolGuide

Getting started

Welcome

The guide to Procol, the black-and-white darkroom that takes your photographs along the road the light travels, from the lens to the toner.

Procol is a darkroom for black and white. Open a colour photograph and Procol sends it down the road the light used to travel: through a lens, onto a film, into the developer, under the enlarger, into the toner. What you get at the end isn’t a ‘desaturated’ photo: it’s a print, in which every grey was chosen.

A whiter shade of black: the motto says what we’re after. Not black and white, but everything in between.

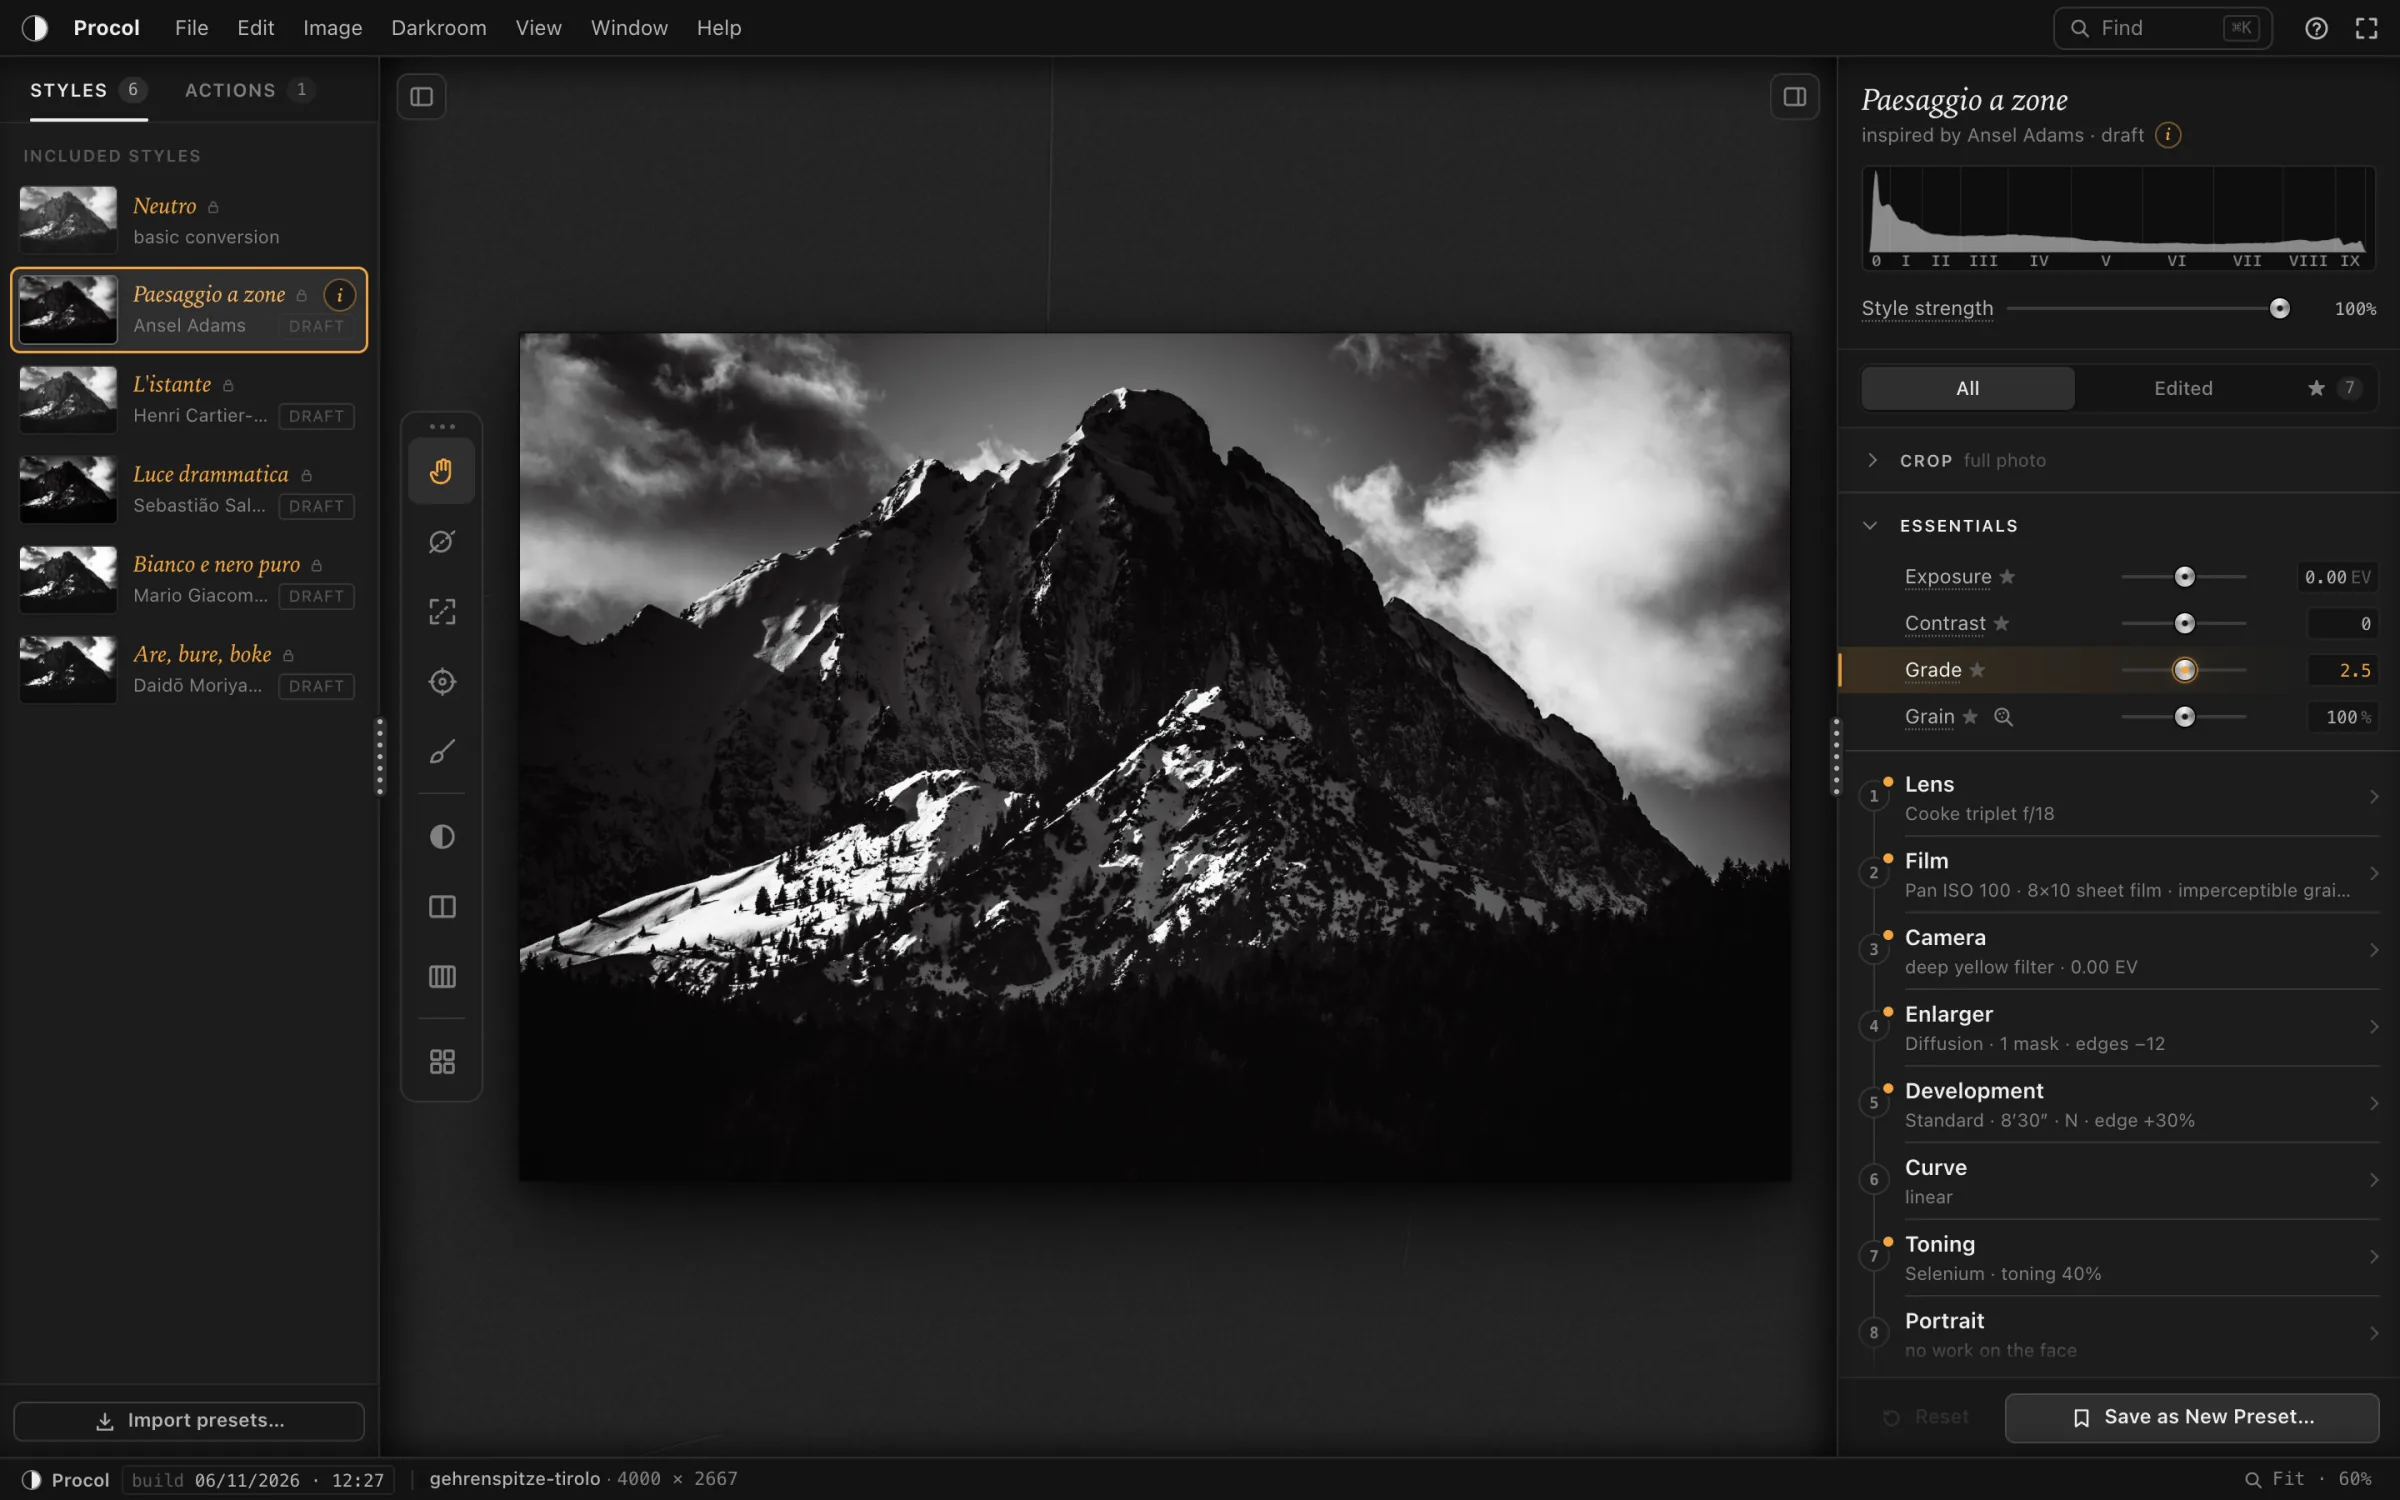
Procol with a mountain photograph printed in the Paesaggio a zone style: the styles on the left, the print in the middle, the inspector with the stages on the right
Procol at work: styles, print, inspector

What you’ll find in this guide#

This guide is written for people who take photographs. Some of you have spent nights under the safelight, others have never seen a developing tank: it works for everyone. Every command is explained through three questions: what it does, why you might want it, how to use it. No formulas.

Here and there you’ll find two kinds of box:

Command and button names are in bold, menu paths in italics (File › Export…). Keyboard shortcuts, such as ⌘ E, always come with a command you can see on screen: Procol works with a finger too, and no feature lives on the keyboard alone. On Windows and Linux computers, where you read ⌘ press Ctrl, and where you read ⌥ press Alt.no feature lives on the keyboard alone.

Where to start#

  • First time? Read Getting started: ten minutes, one photo, one exported print.
  • Want to find your way around the screen? The interface describes every part of the window.
  • Want to start from a recipe? The styles introduces the six starting points that come with Procol.
  • Looking for a particular command? Use the search at the top of this guide or, inside Procol, Edit › Find a Command… (⌘ K).

The road the light travels, in brief#

In the inspector, to the right of the print, the analogue chain is a row of numbered stages. Each one stands for a moment of the work in the dark. You’ll find them described one by one in the analogue chain.

No. Stage The gesture
1 Lens The glass and its era: the aperture, the flare, the soft corners.
2 Film How colours become greys, the negative format, the silver grain.
3 Camera How much light, which coloured filter in front of the lens, camera shake.
4 Enlarger The head, the print exposure, the burning-in, the masks.
5 Development The developer and the time in the tank: the contrast of the negative.
6 Curve A free retouch of the tones, drawn by hand.
7 Toning Selenium, sepia: the tone of the silver.
8 Portrait Experimental: printing guided by the face.
9 Post-processing Experimental: the darkroom pushed further.

You don’t have to go through them all. A style has already set them for you: you only open the one you want to get your hands into.

Procol is our own interpretation#

Behind every slider there are the darkroom books and a written model, but the result is our own reading, not a copy of a material or of a photographer. The styles are inspired by great photographers: their work remains theirs, and none of them took part in Procol. Look at the prints with your own eyes, and change them.

Procol has no colour, and won’t have: it’s an app for black and white.

Your photos stay home#

Procol works in the browser, on your computer or your tablet. The photographs you open aren’t uploaded anywhere: they’re processed where they are, and go back to your disk only when you export them. After the first visit Procol works without a network too. The details are in Licence and privacy.

Procol is a macOS app. The photographs you open aren’t uploaded anywhere: they’re processed on your Mac, and go back to your disk only when you export them. Procol doesn’t use the network to work. The details are in Procol for Mac.

The guide from the app#

This guide also opens from the app, in a new browser tab: with the ? button at the top right, with Help › Procol Guide or with F1.in your browser: with the ? button at the top right or with Help › Procol Guide (⌘ ?). In the sections, the ? next to the name takes you straight to that section’s page. The app’s search (⌘ K) also finds the guide’s pages and paragraphs.
All chapters#

The analogue chain

The analogue chain Procol’s stages, from choosing the lens to toning: what each one does, how they open and how they work together along the road the light travels. 1Lens The Lens stage in Procol: the lens design and its era, the aperture, the coating, flare, glow, corners, distortion, soft focus and light falloff. 2Film The Film stage in Procol: the emulsions and how they turn colours into greys, the negative formats, the exposure index, the grain, the print size, the grain index and actual size. The grain editor The grain editor pop-up in Procol: the loupe on the print at actual size, the microscope on the grains, the grain looks, the grain shape and the tonal response zone by zone. 3Camera The Camera stage in Procol: exposure, shutter speed and reciprocity failure, support and camera shake, the coloured lens filter and the custom filter. 4Enlarger The light that travels from the negative to the paper. Head, print exposure, masks, edge burning, flashing, print diffusion and border in Stage 4 of Procol. 5Development The Development stage in Procol: the developer, the dilution, the time in the tank with N+1 and N−1, edge effects, compensation, agitation and pyro stain. 6Curve The Curve stage in Procol: the freehand curve editor, Contrast, Highlights and Shadows, and under More, Whites, Blacks, Lifted blacks and Lowered whites. 7Toning The baths after the print that change the tone of the silver. Selenium, sepia, gold, copper, blue, selenium plus sepia and the custom tint in Stage 7 of Procol. 8Portrait (experimental) Stage 8 of Procol, experimental: retouching and printing a portrait guided by the detected face, with recipes inspired by ways of printing and retouching. 9Post-processing (experimental) Stage 9 of Procol, experimental: the darkroom pushed to extremes. Intensifying and reducing the negative, the Sabattier effect and Mackie lines.